Friday, 11 September 2015

Frostgrave Scenery Project 02

Following on from Part 01.

In my previous post I built the main structure of the the Wizards Tower. This time I am starting to add a little detail.


I have used some spruce strips, they are stronger and more durable than balsawood, however balsa would be a good alternative. I will need several ladders, and these can be tricky to make. I used two square section spruce strips for the sides and then cut the rungs from thin bamboo strips that I got from an old bamboo window blind.


The roof is not finished yet, I have more strips to add and then some tiles to add on top of that.


I used flat spruce strips for the floor of the bridge, and then built up the sides and supports.


I have also added some spruce joists to the underside of the floors in the tower.


I wanted to have some damage to the bridge, however it is quite high on the model and I didn't want figures falling off and ruining their paintwork so the simplest thing was to only have a small break in the hand rail!

The other side of the tower, I wanted to have a different style of bridge. This one will be a stone arched bridge.


I have used 5mm foam core for this.


Next time, I will be adding a more detailing and starting to disguise some of the card and foam core...

Tuesday, 8 September 2015

Playing with a CNC Milling Machine

We have had a small CNC Milling machine in the workshop for a couple of years and have used it for the occasional job (with mixed success). However, we have ad some time to play with it this summer and are improving our experience with it.

I do not have enough knowledge of 3D design to have designed this job, I downloaded it from Thingiverse.

I have run the file several time, either in styrofoam or Model board.

The first one was done in styrofoam and cut quite quickly (under 2 hours). The detail is low, but it will make a good weathered stone statue.


After the foam model I wanted to up the quality so I decided to use model board (a dense polyurethane foam board). I also used a very small pointed cutter and set the layer height to .3mm.
The job took eight and a half hours, but the detail is far more impressive. This video, taken at several points during the cut, shows how slow the process was...


 This if the finished piece.


Next I plan to try a hard wood version with a small ball nose cutter...

Saturday, 5 September 2015

Frostgrave Scenery Project 01

As I stated in my last post, over the next couple of months I am going to be building up a series of terrain pieces to use in our Frostgrave campaign.  I started by going through the rulebook and listing all the specific piece that are used in the scenarios, which are as follows:-

Square Mausoleum Building, 6" per side with a door in each wall.

Ruined Wizards Tower - at least 10" high with three floors. This tower must have a building either side of it with a bridge or ladder allowing access to the upper storeys.

Underground Library- The table must be covered in multiple decaying book shelves and rubble. There should be a door or entrance point on each of the four sides of the table.

6 Statues in a 12" square ruin.

Haunted Houses - Six small stone monks huts with no roof!

A Well or Fountain

Four 2" diameter discs to act as teleport points..

6 Columns or ruined columns.

On top of these specific pieces we will need a selection of generic ruins.

The only one that I have decided to avoid is the Underground Library as I think the work needed in making a mass of book shelves to fill the table, would have limited re-usability, as it could only be used for the one scenario. The rest will hopefully be usable for other fantasy games as well as possibly historical one too.

Thee four discs for teleportation points should be easy enough and even if I can't use them too much, I am sure they can be used as objective markers in future games.

So, first up I have decided to go with the Ruined Wizards Tower.

As this piece has to have a tower and a ruined house at either side of it I used one of the 40x20cm bases that I had made.
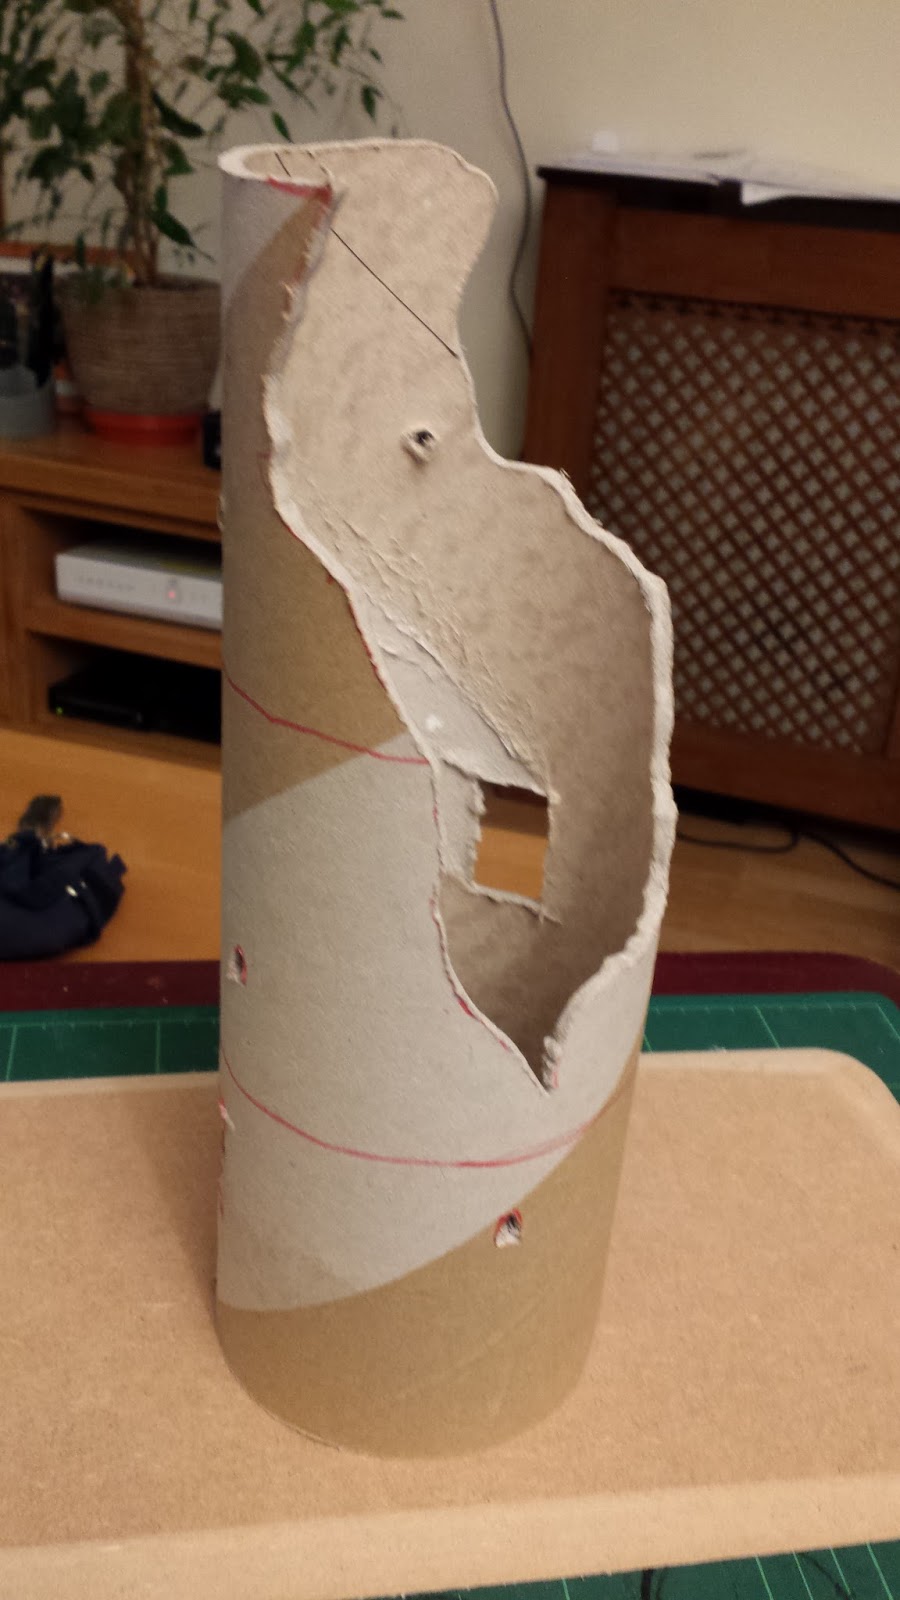
I took a length of heavy duty cardboard tube and marked it out where I needed to cut it!

The tube is 4 or 5mm thick, so to tough to cut with a knife. I decided that for speed I would use my Jigsaw. This is a bit dangerous as trying to cut a curved tube can be tricky, I have 30+ years experience as a professional model maker, but for anyone not used to using these saws I would recommend a fair bit of caution when trying to cut tube like this! I also used a 6mm drill to drill some holes that I will shape into windows.


I plan to use Foamcore board for most of the construction work in this series of builds. Foamcore, as the name suggests, is a sandwich of foam with a layer of thin card on both sides. It cuts easily and accurately, and the thickness (I have both 5mm and 3mm sheets) is great for representing ruined walls.

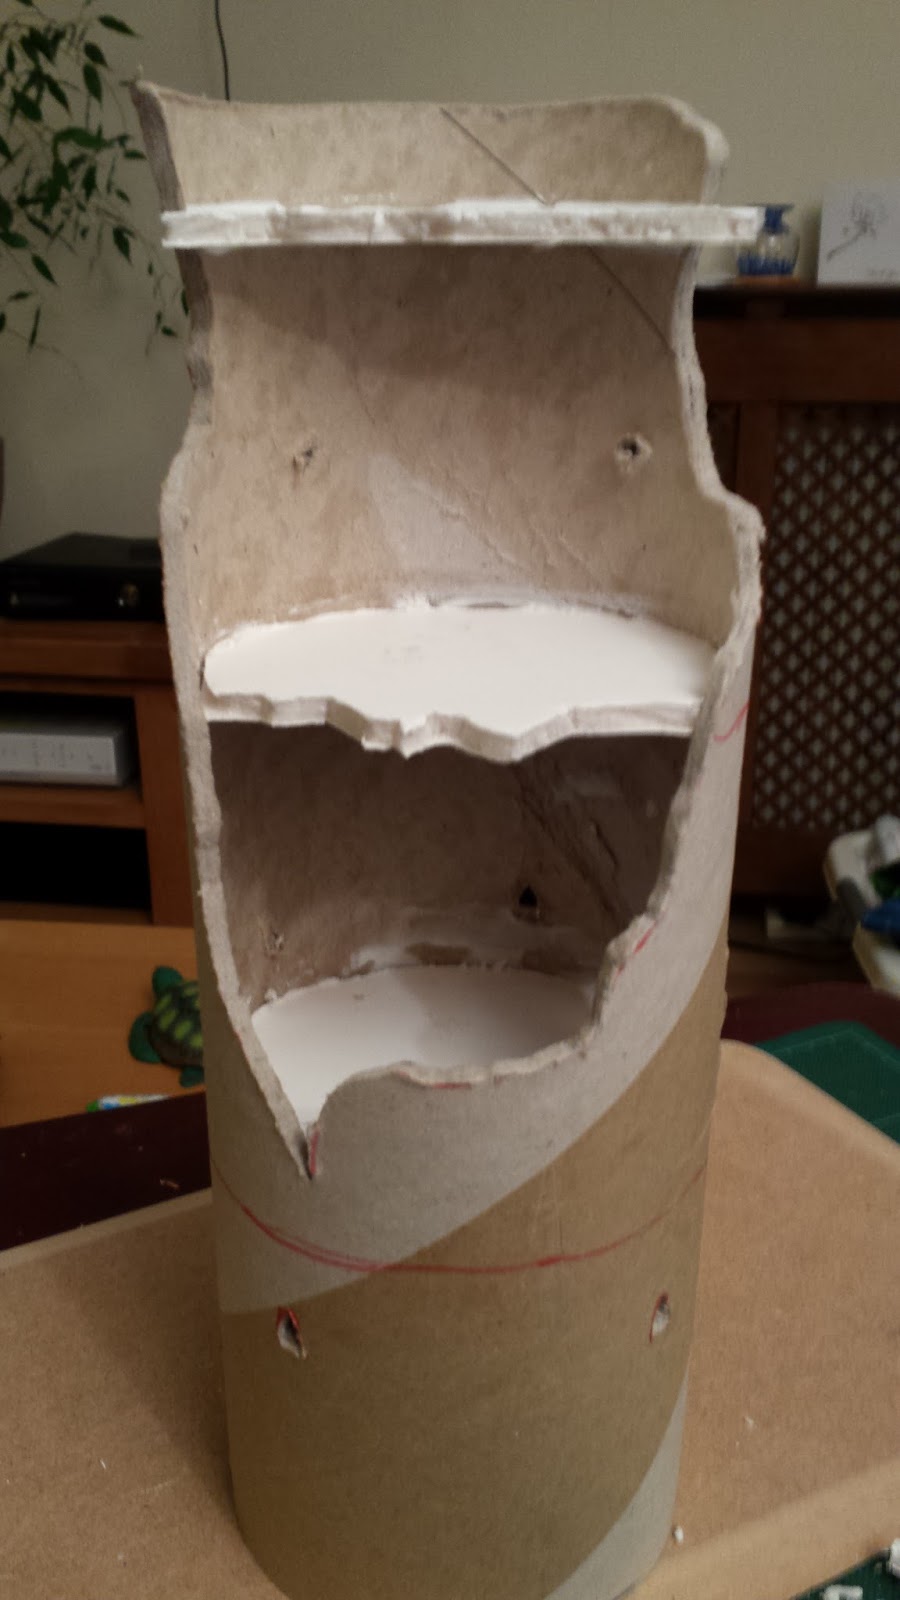
First up I have cut three discs that will be used for the floors of the tower. I simply placed the tube over the foamcore and drew around the inside of it. I am not aiming for perfection with the cutting of the pieces as the ruins will be covered in rubble and this can be used to hide any imperfections...


I cut sections out of the discs to show where the side of the tower had collapsed. Then glued them into the tube.


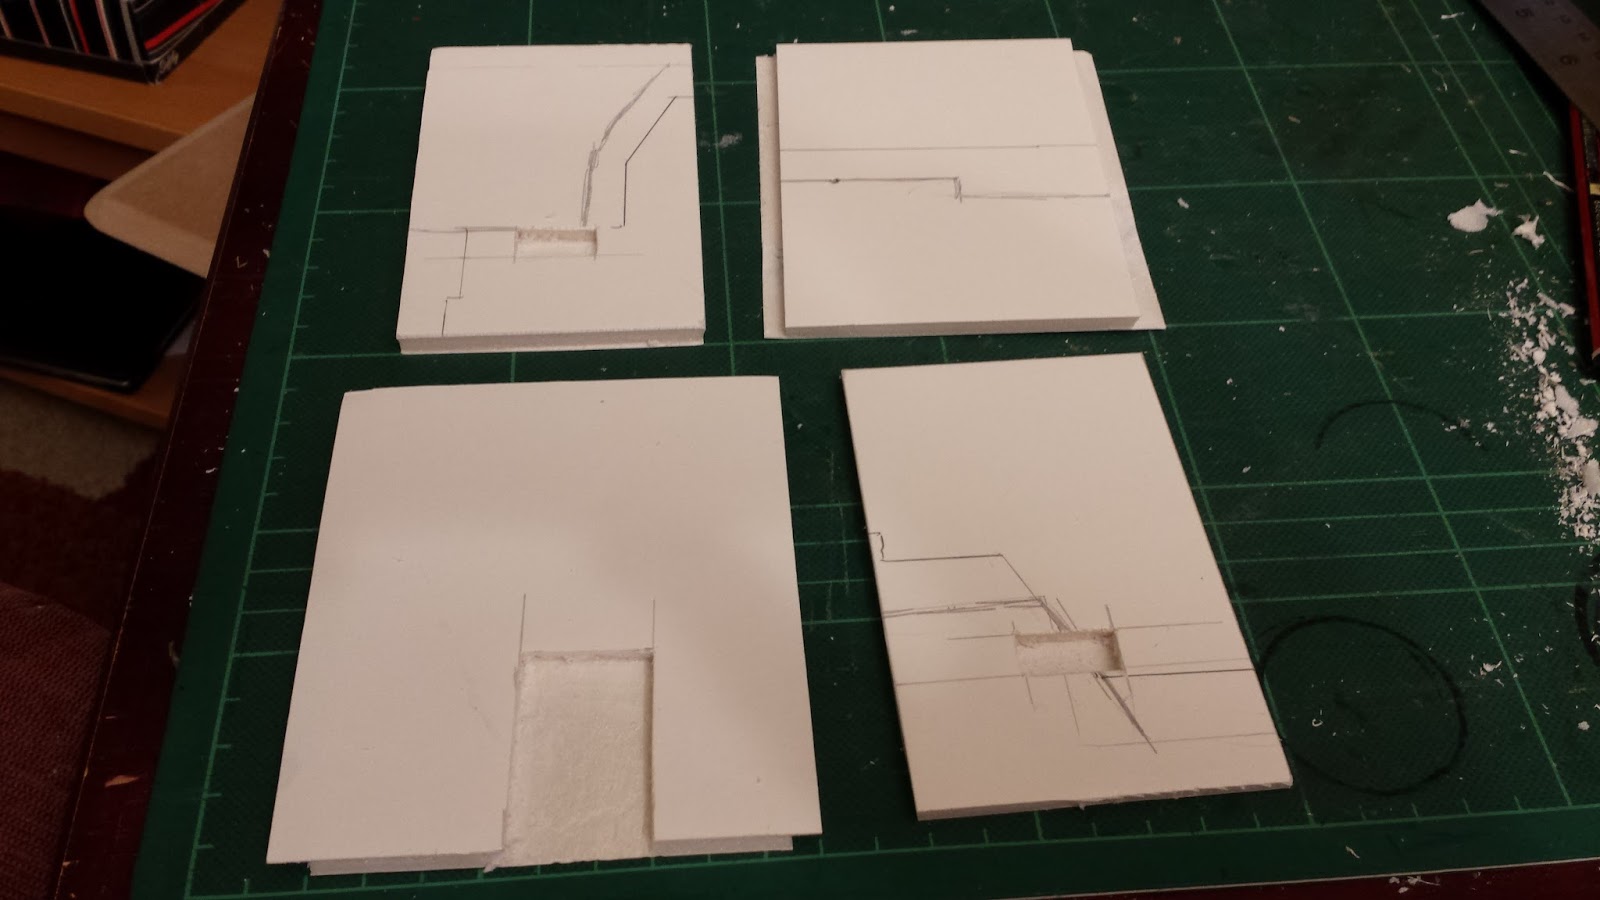
Next I stated work on the ground floor of the two houses either side of the tower. To hide the edges of the foamcore I cut away the inner side of one edge, removing the inner card and the foam. This leaves a strip of card which can be stuck over the edge of the wall that is glued to it.


I glued the two ground floor buildings on either end. One I had cut open as a ruin but the other I had left intact. I also cut some rectangles of foamcore to build up a staircase to the towers entrance which was raised above the ground.


I decided that both outer building should have open damaged walls on the ground floor, so I used a sharp scalpel to cut the intact one open too. I then repeated the process of building the four walls, to add the first floor on to them. I also cut a rectangle of foamcore for the floor of each house.


I cut windows into the walls of the buildings and also a doorway on one of the first floor walls where it will lead to a bridge into the tower.


It all looks fairly crude at the moment, but as these are all going to be ruins anyway I didn't feel it was necessary to spend to much time making it all neat! Next up I will move of to adding some balsawood and spuce strips to give the buildings some detail and character!

Tuesday, 1 September 2015

Some time to think, planning future projects... Frostgrave!

This summer has proved to be a very difficult one for my model making projects. Earlier in the year we went through some family health issues which led to a bereavement. While dealing with that I found it impossible to concentrate on any model making or sculpting work. Due to this I had to back out of a sculpting job that I had been really enjoying, and that would almost certainly have led on to more work.

On top of that, in my day job we have just moved to a new building, which has meant creating a whole new model making workshop and also taking on a new guy to help me out... The move is more or less complete, however we are still waiting for all the new workshop machinery, which will hopefully arrive in the next couple of weeks.

Stepping back from the sculpting work gave me a chance to consider where I want to concentrate my sculpting. I have decided that I am going to restrict myself to personal projects that I have been planning for some time and not take on any sculpting commissions for a while (although I am still taking on commercial model making work). I have a couple of ideas that I have been working on and it is about time I took them in to 3D. I can't reveal what these projects are at the moment as I want to get several pieces sculpted before I do the big reveal, consequently I doubt that I will be doing many sculpting articles for a while, so the focus of this blog will be on my model making, for a bit.

On a personal level, once my gaming pals and I have finished our Star Trek: Attack Wing campaign,  we are planning to start playing Frostgrave (from Osprey Publishing) and this has inspired me to start a new terrain building project. I have gone through the rulebook and listed all the terrain needed for the scenarios. This is the starting point for the project as I want to make terrain  that can be used for these, but will also be useful for more generic games too.

As a terrain heavy game that will have wizards and their followers fighting through the ruins of a long dead city, it means anyone running the game is going to need a fair bit of terrain. I hope to be able to show that this is not too daunting a task, and that you can put together a lot of reasonably good looking terrain quite quickly and without spending a fortune!


I have started the project by cutting a series of boards that will be used for the bases for the terrain pieces. I cut and sanded a number of 20cm x 20cm pieces and also several 20cm x 40cm pieces. Each base will hold an individual ruin and once they are all brought together they should give the feel of a ruined city. Also by using this modular system it should be possible to generate different tables every time we play!

In my next post I will look at the first ruin I am building, A wizards tower!

Thursday, 18 June 2015

Laser Cut Shipping Container Build

Last year I designed a shipping container kit so that I could build some terrain for my Across The Dead Earth games.


I know there are already plenty of companies out there that produce shipping container kits, but none of them really worked for me. some are far too simplistic, others are too sci-fi, I wanted plenty of detail and containers that can reasonablypass for 20th century onwards...

This is how the kit goes together...

 Asyou can see there are quite a few parts, for what is basically a box...


The first part of construction is putting together the sides and the top. The two square frames go at either end and basically hold the whole thing together.


Once I had glued the two sides on I immediately glued the top in place.


 Once the top is settled in I used a couple of rubber bands to hold the structure together while the glue dried.


 Next up I glued the inner walls into place.


These clamps were pretty much essential throughout the build.


 Once the sides had dried I glued the inner roof in place.


 For the back of the container it proved easier to glue the two parts of the wall together before assembly.


I made the back wall a simple push fit. Simply run a little glue around the inside of the frame.


 A snug fit in the back frame.


Next I glued the base of the container in place.


This completes the main structural build, only leaving the doors to finish off.


Each door is made up of four parts.


Firstly you need to glue the two door plates together. I found running glue across the doors like this to be the best way.


When the two pieces go together it is important to line up the holes. Turn the doors over and insert the two small U shaped pieces, there should be enough glue already in the holes to retain them.


Then put them aside to let the glue set.


At this point I found I can put the doors in position on the containers and they will stay in place quite nicely. They are designed to be positioned either open or closed. I assume that most will be glued shut, but it is nice to have the option of an open container...


Once the doors are in place, take two cocktail sticks and side them though. Mark the length with a pencil.


Cutting the sticks can be done in several ways. If you are in a hurry, a pair of sprue cutters (wire cutters) will do the job reasonably well, otherwise a fine saw or even a sharp knife will do...


When I designed the kit I left the handles in a small frame as they are so small they are easily lost.


Cut them out with a sharp knife.


Glue them in position as you see fit...


That's it the container is finished. I could have made them simpler to assemble but I wanted to get a reasonably accurate 3D effect with the walls and also the doors, so this seems like a fair compromise.

Related Posts Plugin for WordPress, Blogger...